Telescoping Poles For Window Cleaning

Professional window cleaners use a wide range of equipment, including telescoping cleaning poles with attachable heads that reach second-story windows. Typically, these kits start at about $100 and can be purchased at home improvement stores.

Window Cleaning

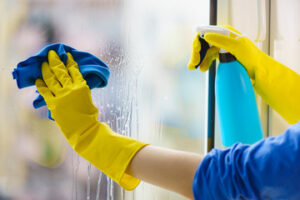
When washing windows, use a rubber-edged squeegee to avoid spots and smears. Also, consider a squeegee with a microfiber blade to wipe surfaces clean without leaving streaks. Visit Website to learn more.

Allergens like dust, pet dander and pollen collect on windows and can make people sick. By having your windows cleaned regularly, you can reduce the amount of allergens in your home. This will also help with any asthma or other respiratory conditions you may have. Window cleaning professionals use commercial grade equipment to rinse away all the dirt and contaminants from your glass. They also scrub and squeegee the edges and sills to leave your windows spotless and dry.

Before starting on the actual cleaning, it is a good idea to close all the windows and wipe down the frames and sills with a clean, lint-free microfiber cloth. This will prevent dust from mixing with your window cleaning solution and making streaks on the glass.

It is also a good time to remove and label the screens on the windows. These should be washed in a bucket of hot water and a mild detergent such as dawn or dishwashing liquid. Then they should be rinsed off with a hose on a sprayer set to “water only.” After the screens are dry, they can be put back onto the windows.

Using a microfiber cloth, start wiping the glass panes with a circular motion. Work from the top of the window down, catching any drips as you go along. Change to a clean section of the cloth frequently as it becomes soiled. For tough stains, apply a little cleaner to the cloth and rub in a circular motion. Be careful not to scrub too hard, as the glass can easily scratch.

If the windows are particularly dirty, you may want to use a soft scrub brush or nonabrasive sponge. This can be especially useful if there are rust spots or bird droppings on the glass. For stubborn stains that are difficult to remove with any of the other methods, try a razor blade mounted in a plastic holder. Be sure to test the blade on an inconspicuous area to ensure that it won’t scratch the glass. If the stains persist, you might need to sand the surface of the glass with an electric sander and re-clean the window.

Stains Removal

Water stains can be a real eyesore on your windows. They can make your glass appear cloudy or hazy, which reduces visibility and can diminish the overall aesthetic of your window. They also create a breeding ground for mold, which can affect indoor air quality and cause a variety of health problems for the residents of your home or business.

There are a number of different ways to remove these stains during the window cleaning process, including a simple solution of vinegar and water, as well as traditional glass cleaners. Regardless of the product you use, it is important to scrub your windows thoroughly to ensure that all traces of the stain are removed and your windows are left spotless.

Depending on the type of stain, you may need to use a more aggressive cleaner, such as Diamond Magic. This product is safe on most surfaces and can be used on a wide variety of stained materials. Alternatively, you can try using a baking soda solution. Mixing baking soda with warm water will create a paste that you can then apply to the stained area of the window. The abrasiveness of the baking soda will help to break down the mineral deposits, allowing you to wipe away the water spots and leaving the glass clean and clear.

Another great way to get rid of hard water stains is by rubbing the window with lemons. The acidity of the lemons can dissolve the water stains, which will make them much easier to wipe off. Once the stains are gone, rinse the window with clean water and dry it with a towel to prevent them from reappearing. If the stains are particularly stubborn, you can try using a commercially-produced hard water stain remover. Follow the instructions on the label to determine how much of the product to use and how to apply it to the window. After applying the solution, let it sit for a while to give it time to break down the stains. Rinse the window thoroughly and then use a glass cleaner to make sure the residue is completely removed.
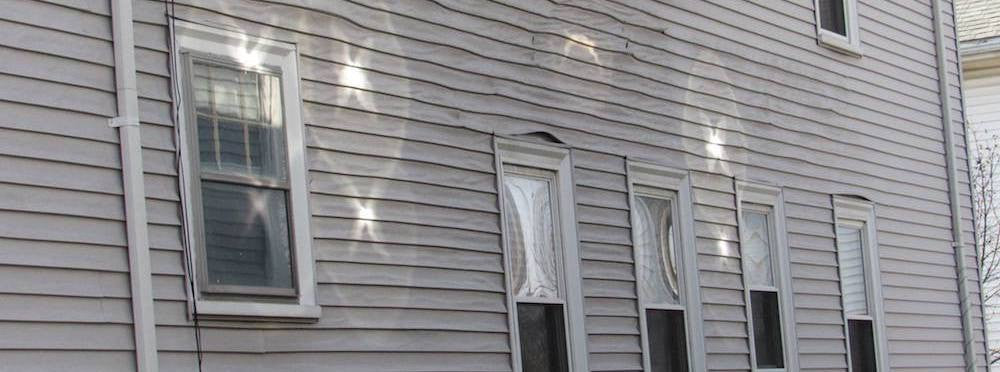
Cleaning the Frames

It’s important to keep window frames and sills clean as well, since they can collect dirt, soot, dust, cobwebs, dead insects, gnats, and other debris. They should be vacuumed or dusted with a soft brush, paying special attention to corners and crevices. They can also be wiped down with cleaning wipes that can be purchased at most home improvement stores. Always read the label to be sure that the wipes are safe to use on the particular surface you’re cleaning, and don’t forget that they can leave a residue behind if not completely removed.

When washing a wooden frame or sill, it’s usually best to start by applying the cleaning solution to a cloth rather than directly to the wood. This will prevent over-saturation, which can cause the wood to swell or warp. For this stage, a non-detergent soap solution that’s safe for wood is typically preferred. A teaspoon of bicarbonate of soda can be added to the solution if necessary for a particularly stubborn stain. For vinyl or aluminum frames, a mild soap or commercial glass cleaner can usually be used.

Once the soapy solution has been applied, it’s important to scrub thoroughly in order to remove any built-up grime and stains. A soft-bristled brush may be needed for tough spots or in the case of a very stubborn and persistent oxidation spot, it might be advisable to try a bit of sandpaper for extra power.

After a thorough scrubbing, the frame should be rinsed off with a damp cloth. Wooden frames should be dried very thoroughly, as too much moisture can lead to rot or mold growth. Vinyl or aluminum frames can handle a little more water than wood, but they should still be dried quickly in order to avoid damage.

Afterwards, the window tracks should be cleaned using a dusting powder that’s safe for your particular type of frame. The powder will loosen any dirt that’s stuck and make it easier to wash away with a brush or a sponge, or even a squeegee. Be sure to check out our guide to the best squeegees for more help in choosing the right tool for your job.

Squeegeeing

As the final step of window cleaning, a squeegee removes any residue that remains on the glass. A squeegee is an essential tool for achieving a streak-free finish, and it’s easy to see why pros use them. They’re available in a variety of shapes, sizes and materials, but most are made of durable plastic with a rubber non-slip coating. Some models have a short handle while others are equipped with telescoping poles that extend more than five feet. A long-handled squeegee is essential if you need to reach tall windows.

The first thing you’ll want to do when using a squeegee is wipe it down with a clean cloth or rag to remove any excess water or cleaner. You can also apply a degreaser or mineral deposit remover to the squeegee before use if your windows are especially dirty. A squeegee with a textured blade (for example, one of Ettore’s top-rated models) will be better at removing water spots than a plain rubber squeegee.

When squeegeing, avoid wiping in straight lines. Instead, move the squeegee across the glass in an “S” shape to avoid leaving any streaks. As you make each S pass, periodically wipe the squeegee’s rubber blade with a clean cloth to avoid smearing the cleaner over an area that’s already dry.

Aside from avoiding streaks, you’ll also want to avoid any mistakes that can slow the cleaning process. A common mistake is cleaning a window in direct sunlight, which can cause the cleaner to dry on the glass before you can wipe it off. This can lead to hard-to-remove streaks. To prevent this, try to clean windows in the shade if possible.

Another common mistake is relying on paper towels and newspapers for scrubbing and drying, which can leave lint behind on the glass. You should instead use reusable microfiber cloths, which are super absorbent and leave windows shining and streak-free. You can find them at home and garden stores or online retailers.

Benefits of Window Tinting

Depending on the type of window tint you choose, it can offer a variety of benefits. This includes reducing the amount of heat entering your car, protecting the interior of your vehicle and the people inside it from harmful UV rays, and offering a higher level of privacy.

Window Tinting

Tint also helps to hold broken glass together in the event of an accident, minimizing potential injuries from flying shards. The types of window tints available vary in their durability, appearance, and functionality. Contact Pro Window Tinting Wichita for professional help.

Window tints contain elements that reflect and dissipate a portion of the heat that is radiated by the sun. They also prevent harmful UV rays from entering the interior of your vehicle, which can cause your skin to burn and fade upholstery and carpeting. Moreover, window tints can protect your car’s interior by keeping the glass from cracking and shattering in the event of an accident. This makes the windows safer for passengers to be in, and they can hold shattered glass together, which helps minimize the risk of injury.

A window tint’s ability to reduce heat depends on its color and its level of reflection. A tint with a darker color will reflect more of the heat than a lighter one. Tints with a higher heat rejection rating allow more of the visible light to pass through, while reducing UV and infrared rays that generate a lot of heat. You can tell how much heat a tint will reject by looking at its Visible Light Transmittance (VLT%) and Visible Light Absorption (VLA) ratings.

The temperature inside your home or vehicle can rise rapidly during a hot Austin summer, leading to discomfort and even health issues. Window tints help regulate indoor temperatures and can save you on your energy bills. This way, you can spend your money on more essential things and extend the life of your AC equipment.

A common misconception is that window tints make the inside of your vehicle too cold, but this isn’t the case. Most tints on the market today provide a comfortable temperature, even in the hottest conditions. Window tints are designed to keep your car’s interior cool while providing you with enough natural light to see the road ahead of you.

Tints can also lower glare by restricting the amount of light that enters your vehicle. This will improve visibility and decrease eye strain, making driving more enjoyable for you and your passengers. Window tints will also help you retain your car’s cool air during long trips and prevent your seats from becoming steamed up after parking in direct sunlight for too long.

Reduces Glare

When bright sunlight is reflected off a car windshield or bounces off the road, it can be blinding. This type of glare can cause temporary vision loss and distract drivers, causing accidents and increasing the risk of injury. Window tint reduces glare to make driving safer and more comfortable.

Window tints block 99% of UV rays, which can damage interior upholstery and dash surfaces. The tint also reduces fading, keeping your car looking brand new and preserving its value. This is important, as most auto thefts are crimes of opportunity and criminals break into cars that they can see have valuables inside. Tinted windows and film can prevent thieves from being able to see what’s inside your car.

Even a light film can significantly reduce glare in homes and offices. Window tints can filter out a large percentage of the sun’s brightness, making it easier to work with electronics like computers and TV screens. This can also help reduce the need for air conditioning, further helping to lower energy costs.

Tinted windows are also a great way to boost your home’s curb appeal. The darkened glass can create a sleek and modern appearance, making your house or office look more stylish and attractive. Window tint is often available in a variety of colors and shades, so you can find a color that matches the style of your décor.

The most popular window tint is a black or charcoal-colored film that can dramatically improve the aesthetics of your home or car. There are also several clear and silver films that allow some natural light to pass through while providing privacy and protection from the sun’s harsh rays.

When choosing a window tint, it’s essential to choose a high-quality film that is installed by professionals. A quality film will be scratch-resistant and heat-resistant, ensuring it lasts for years. It’s also important to clean your window tint regularly to maintain its clarity and protect it from premature wear and tear. Avoid using abrasive cleaners or rough materials, as these can damage the surface of your window tint.

Increases Privacy

Window tinting adds privacy by obscuring what’s inside your home or car. Tinted windows allow natural light into the interior, but people outside can’t see inside your home or vehicle. This type of tint offers a great level of privacy in the summer and winter, especially as the sun moves throughout the day and night.

Besides providing added privacy, residential tinting also reduces glare. This allows you to read, work on your computer or focus on a TV screen without straining your eyes. Many homeowners find it difficult to finish home projects or focus on their work due to glare from sunlight coming through the windows, but window tinting eliminates this problem.

There are many different types of window tint films, and each has its own benefits. For example, reflective window film is typically made with copper or silver and is designed to reflect the amount of sunlight that hits it. This gives your home a mirror-like appearance on the exterior side and creates privacy during daylight hours.

Another popular option is tint that provides a frosted look for the glass, blocking visibility from both sides. This is ideal for homes that need a high level of privacy, such as bathrooms. The frosted appearance is also an effective deterrent for burglars trying to peer into homes in order to spot valuables to steal.

The best way to choose the right type of window tint is to consider the features you want the most. If you’re looking for heat reduction and UV protection, for instance, be sure to choose a dark tint that blocks 99% of harmful rays that cause sunburn and damage to furniture and dash surfaces.

Another benefit of window tinting is that it can help you save energy by lowering your heating and cooling bills. This is because the window tint absorbs a large portion of the sun’s heat, keeping your home cool and reducing the amount of energy you have to use. This is especially true in the winter, when your heating system is usually running more often and you need to use more energy.

Increases Safety

In addition to keeping your vehicle cooler and reducing glare that interferes with driving (or watching TV or working on a computer), window tinting offers other safety benefits. For example, it can help hold shattered glass in place so that you and your passengers don’t get hurt by flying debris in the event of an accident or collision. Window tint also protects you and your passengers from harmful UV rays. UV rays are known to cause skin damage and increase the risk of certain types of cancer, and many tints block up to 99 percent of them.

Another safety benefit is that tinting makes it harder for criminals to see what’s inside your vehicle. This can deter them from breaking into your car to steal valuables and other items. While it’s always a good idea to remove your valuables from your vehicle when not in use, that isn’t always possible or practical. In these situations, a tint can keep your items out of sight and out of mind so that thieves don’t target your vehicle.

Window tint is not only a great option for cars, but can be used in homes and businesses as well. For example, it can be applied to any glass that separates meeting rooms or private offices from the rest of the space and affords privacy without sacrificing visibility. It can also be used on shower doors or even frosted glass to create a decorative, yet functional, look.

While tint can offer all these safety benefits, it’s also designed to add strength to standard windows. This is a good thing because it can make your car more resilient against things like bad weather, broken tree branches, and even vandalism. This extra layer of protection will also ensure that minor chips and scratches won’t spread as quickly.

If you’re interested in improving your car’s interior and exterior with a quick and affordable upgrade, window tint is a great option. Not only will it make your car more comfortable, but it can also boost energy efficiency by reducing the need for excessive air conditioning. Plus, it can provide an added level of security and safety while also making your car more attractive.

A Three-Step Process For Window Replacement

Old and damaged windows don’t just look shabby; they can contribute to high energy bills. Replacing them with new, efficient windows can ease the burden on your wallet and make your home more comfortable.

Window Replacement

If you’re considering window replacement, get estimates from several companies. Consider things like frame material, window type and adding options such as argon or krypton gas-filled glass to improve insulation and reduce noise. Visit https://www.kelemerbrothers.com/ to learn more.

When it comes to window replacement, there are many factors that go into a quality installation. This includes the style of windows that work best with your home, the materials chosen for your window frames, and the overall look you are going for.

Before the crew arrives on the day of your window installation, it is important to prepare the area for the project by clearing away furniture and wall hangings that could get damaged during the construction process. This will also help the crew have easy access to the areas they need while working. The crew should place tarps in the area they will be working to keep the floor clean and minimize debris from being tracked throughout your house.

The removal of existing trim should be done carefully to avoid damaging the wall or existing window frame. This is especially true if the trim is to be reused around the new window. Using a tool to score the caulk and pry it loose will allow the trimming to be removed without leaving any marks behind. If the trim needs to be cut, it should be done with a handsaw or jigsaw for the safest and most precise removal.

Once the old window is removed, it is important to remeasure the window opening. This will ensure that the new window is the correct size to fit the frame. If the window is not the correct size, it will not seal properly and can lead to water leaks and mold growth. The measurement process is done both vertically and horizontally to account for foundational movement that can shift the window opening over time.

Once the measurements are made, the new window will be ordered and the crew will begin to install it. This can take a few days, depending on the number of windows being replaced and the size of your home. Before beginning the actual installation, the crew should walk through the scope of the job and reconfirm all details with the homeowner. This will give the homeowner an opportunity to ask any last-minute questions or concerns.

Measurement

Window replacement is a great way to upgrade the look and feel of your home while also increasing its energy efficiency. However, it’s important to take the proper measurements before purchasing replacement windows so they will fit in the existing window opening properly. In this blog post, we’ll walk you through a simple three-step process for taking the necessary measurements.

Start by measuring the width of your window frame in three places, on the left, middle, and right side of the frame. Write down the smallest measurement.

Next, measure the height of the window frame in three places, on the top, middle, and bottom. Again, write down the smallest measurement. Finally, measure the depth of your window frame in two opposite diagonal directions to check that your window is square. If it isn’t, use shims to fill the gap between the frame and the framing.

When measuring the width of your window frame, make sure to keep the tape measure snug against the trim boards and avoid any slack or flex. Also, be sure to take the measurement from the inside of the frame rather than the outside. To do this, position the tape measure at the top corner where the horizontal and vertical trim boards meet and extend it to the bottom right corner of the frame.

For the height of your window, begin at the top by measuring the distance between the head jamb (the vertical piece of trim that extends down from the frame) and the sill, which is the lowest horizontal piece of trim. Continue the process on the left and center sides of the window.

For the depth of your window, open the window and measure from the head jamb to the sill. Repeat this on the left and center sides of the window. Once you have all of the required measurements, it’s time to compare them and decide which window size is best for your home. Ideally, the new windows should be within one-quarter of a quarter inch of each other, which will ensure that they will fit into your existing window opening.

Installation

During installation, the contractor removes your old windows and replaces them with your new ones. They may also install any other window accessories, such as a vent screen or storm door. The crew will then clean up the work area and dispose of your old windows. Before they begin, ask the crew lead to walk through the project with you to make sure that all of your windows match up and are ordered correctly.

This is a good time to point out any special instructions that you may have for the installation. For example, if you want them to save your trim or preserve wall treatments, let them know now. It’s also a good idea to point out any landscaping, furniture or other items that should be protected during construction. The crew should cover these areas with tarps or other coverings.

The contractors will then clean the window opening to remove any dust or debris and prepare it for the new window. If you’ve chosen to add window wraps, they will install these around the perimeter of your new windows and caulk them around the edges. They will also paint any trim or window boxes that need it.

After the new windows are in place, they’ll seal, caulk and insulate them on the interior and exterior to prevent air leaks and water damage. Having your windows properly installed can help you to save hundreds of dollars per year on energy costs.

Your contractor will check that your new windows are centered, level and plumb in the frame with a level or square. If necessary, they’ll use shims to make the window fit the frame more precisely. They’ll also insert shims behind the meeting rails to stabilize them and provide a tight seal.

Before they leave, the crew leader will give you a final tour of your home and demonstrate how to operate your new windows. They’ll also take the time to answer any final questions that you have. Then, they’ll finish the job by testing all of your new windows to make sure that they open and close properly.

Final Inspection

After all the hand-wringing, decision-making and planning is complete, your new replacement windows are finally ready to be installed. The excitement is in the air, and you can start dreaming about the beautiful home that you’ll soon be living in.

Once the windows are installed, it’s important to check the workmanship. It’s possible that the window might be installed unevenly, and you’ll want to make sure that it is squared properly. This can be done by measuring diagonally across the frame, which will show if it’s out of alignment. If it is, a few shims may be needed to make the frame square again.

It’s also a good idea to look at the stops on the frame to make sure they are in place and not damaged. If the stops are cracked or chipped, wood filler can be used to repair them. After the filler has dried, it can be sanded down and then painted.

Another thing to do is to make sure that the caulking has been done properly, and that it’s with an exterior caulk that will withstand the elements. If it isn’t, the seal will fail quickly.

You’ll also want to make sure that the trim around the window has been primed and painted with the right product. If not, the trim will also eventually fail and need to be replaced.

If you have a security system installed that connects to your current windows, make arrangements with the contractor to disconnect it before they arrive. This will prevent the alarm from being activated while they’re working on your new windows.

A full-frame replacement involves removing the existing frame and sash, and installing an entirely new window in a fresh opening with new insulation and trim. This is often necessary when the original window is damaged or if you need a different size or style of window. It’s also a good choice when you want to install a more energy-efficient window. A full-frame replacement will usually cost more than a pocket replacement, but it can save you money in the long run.

The Basics of Residential Sliding Doors

Siding Companies Charleston SC allow for massive openings and create a stronger connection to outdoor space. They also make it easier to move furniture during gatherings and other events.

Consider installing a sliding door in your home or office that uses a reliable locking system. Look for a multipoint lock to prevent break-ins and provide safety.

Sliding windows open horizontally rather than vertically, offering plenty of natural light and ventilation to rooms. They can also help create a smooth transition between indoor and outdoor spaces. They’re available in a range of configurations, and you can choose from a variety of colors and materials for your sliding windows. However, it’s important to understand the basics of sliding windows before you begin shopping for replacements.

The first thing to consider when choosing a sliding window is the operating system. These windows have fewer moving parts than double-hung windows, which makes them less likely to wear out or break over time. This means they can offer a sleeker look and more durable construction without sacrificing the ventilation and visibility of other window types.

Sliding window design is also versatile, and it can fit into almost any architectural style. These windows are perfect for a modern home or bungalow, as they exude simplicity and minimalism. They can also fit into rooms that require large amounts of light, such as the kitchen or living room.

If you’re looking for an energy-efficient option, consider selecting sliding windows with a high ENERGY STAR rating. This will ensure they can save you money on utility bills while helping the environment. Additionally, consider choosing tempered glass for your sliding windows. This type of glass is much safer than standard glass, and it will not shatter or crack when broken.

Another consideration for sliding windows is the amount of maintenance they require. Because the sashes on these windows cannot be opened as wide as double-hung or casement windows, they may need to be cleaned more often. Furthermore, the contact point where the sashes meet is more susceptible to air pressure pushing through, which can result in drafts. However, these issues can be mitigated by choosing a quality product with low-maintenance components like rollers and track systems.

Sliding doors are a great way to connect indoor and outdoor spaces or separate rooms. They open wide, allow for maximum ventilation and lighting, and are easy to operate. They also create a sense of openness and spaciousness and can be combined with window or door treatments to suit your style. They are available in a wide range of styles to match any home, from modern to rustic and everything in between.

These doors can be a stylish choice for commercial buildings, too. They can be used to divide a room or combined with sliding windows for more flexibility and light. They also offer better security than hinged doors and can be fitted with some hardware options to meet your needs.

If you want something more elegant, a barn door can be a fantastic option. This design is reminiscent of traditional European homes and can work well in both modern and rustic homes. They can also be paired with windows to provide more privacy. Another option is a pocket door, which disappears into the wall when opened. This type of door is perfect for smaller spaces where space is at a premium and can be adjusted to accommodate different sizes of openings.

One of the biggest advantages of a sliding door is that it allows for uninterrupted views of your property, which can be an attractive feature if you have children or pets. They can also help increase natural light, decreasing your reliance on artificial lights and lifting the mood of any room in your home.

Sliding doors can also make your space feel larger by allowing more air to circulate. This is especially true in cases where the sliding door opens into a small space, such as a balcony. However, it is important to consider the level of maintenance that will be required for your sliding doors before making a decision. They can accumulate dirt and grime more quickly, particularly in homes with kids or pets, but regular cleaning should prevent this from becoming a problem.

Sliding patio doors can be a beautiful addition to any home. They allow natural light into the space and offer unobstructed views of the outdoors. They are also available in a wide range of configurations. Many doors come with options for customization, including grid patterns and frame colors that match the design of your home. They can even be customized to include sidelights and transoms for a more elegant look.

When installing sliding patio doors, it is important to consider the space required for operation and clearance. Ensure the area is free of obstructions, such as furniture or walkways, to avoid jamming and squeaking. Also, ensure the track is clear of debris and ice buildup in winter. Sliding door tracks are easier to keep clean than hinged or french doors, but they can be more prone to getting stuck due to accumulated dirt and grime.

Another benefit of sliding doors is their ability to provide better ventilation than hinged doors. With a sliding door, it is easy to partially open the panel, which allows for airflow and keeps pests out without compromising security. Some models of sliding patio doors even come with retractable screens that can be concealed when not in use, maintaining the streamlined look of the door while providing insect protection and ventilation.

Sliding patio doors are ideal for tight spaces, as they don’t require the space necessary for swinging like hinged patio doors do. This can save space and allow furniture and other items to be placed closer to the door without obstructing the opening or hindering outdoor access. They also have larger panes of glass, allowing more sunlight to enter the home during the day. This can help reduce the need for artificial lighting and improve energy efficiency. Many models of sliding patio doors also offer privacy features, such as internal blinds that can be adjusted according to your preferences. This can help keep out sunlight and other unwanted guests while maintaining the view. Many also have childproof locks and anti-pinch mechanisms to prevent injuries to children or pets.

French doors are the perfect way to bring a sense of elegance and luxury into your home. They look gorgeous and are ideal for any home design, but what’s great about them is that they provide a wide open space for ventilation, as they can be opened in either direction. While this feature is great, they also require a little more floor space to open as they are hinged and have at least two operable panels. This is a concern if you plan on hosting many people or moving large items in and out of your house.

Sliding doors offer the same aesthetic and functionality as traditional French doors but are more space-saving. They can create massive openings and work well in high-traffic areas where you might want to move furniture around or have someone enter your house. They’re often paired with modern designs and can look stunning in Colonial-style homes.

Both sliding doors and French doors can be upgraded with different locking systems to make them more secure against intruders, but depending on your location, one style is more suitable than the other. Generally speaking, the main difference between them is that French doors lock into the frame and floor, so they’re more challenging to break into. Sliding door frames can still get dirty quicker around the tracks, but regular cleaning usually solves this problem.

While both door options can be upgraded with various features, the cost for each can vary significantly depending on the type of door, the amount of customization, and additional add-ons. If you’re looking for a set of new sliding or French doors, it’s a good idea to contact and ask about pricing to get an accurate price estimate for the exact configuration you want.

Another thing to consider is that while sliding doors can be installed with in-swing or out-swing options, French doors must be installed with an out-swing option if you want both to open. This will make your door more difficult to install, but it’s not a deal breaker.

Best Window Sand Siding Techniques

Window Sand Siding

If there is any rot in the substrate around the window area it should be repaired prior to siding installation. If not, water will be trapped and will rot the frame and wood.

Start at the bottom of the wall and work your way up, overlapping each piece as you go.

Building Paper

Building paper is the first layer of protection on your window siding project. It keeps water vapor that might get past the siding from saturating the sheathing. This helps prevent rot, mildew and mold. It also inhibits air leaks from entering and causing drafts. Its breathable nature allows it to regulate temperatures inside your home and lower energy bills.

In the past, tar felt paper was used for this purpose and was commonly referred to as building “felt”. It was black in color and could be bought in different strengths depending on its thickness (15lb or 30lb). However, today’s Tyvek and Typar house wraps are much lighter weight and much wider than traditional tar felt. They are more breathable than building paper and roof felt, which makes them even better choices for protecting your clapboard, vinyl or masonry sided walls from moisture and air infiltration.

When properly installed, a layer of building paper (and a waterproof flashing) will ensure your new window is watertight and secure. It is important to overlap the building paper by six inches horizontally and vertically on the sill plate, and to use a waterproof caulking along all penetrations to keep out moisture.

Although this is a great way to prevent water infiltration, it has its drawbacks. Tears and rips can occur in the paper, which diminishes its ability to function as a weather resistant barrier. It also creates a barrier that blocks oxygen from reaching the wood sheathing which can cause the structure to deteriorate.

Using the proper installation techniques for both the building paper and the flashing will help to protect your windows, as well as your entire home from damage. The best method for trimming the edges of the building paper and flashing is to use tinner’s snips. These are small scissors with a pointed end that can be used to trim any sections of the materials you don’t need. Alternatively, you can score the material with a utility knife at the point where you wish to cut it and snap it off along the scored line.

Flashing

Flashing is a sheet of impervious material used to prevent water penetration into walls and to direct moisture away from the wall. It is especially important at junctions, such as roof hips and valleys, joints between the roof and vertical walls, dormers and chimneys, vent pipes, window openings, and so on. Flashing is typically made of galvanized steel or aluminum, and is installed on top of the building paper. It is installed in a manner that is consistent with the construction of the roofing system to ensure it will seal the area effectively.

Before installing the siding, it is important to remove any wood trim that is damaged or rotted. It is also helpful to remove any downspouts, moldings, lights, decorations, or other attachments that might get in the way of your work. Lastly, make sure to scrape all old caulk off the window and door frames before attempting any new installation.

To begin the window installation process, first apply a bead of sand-resistant silicone sealant around the frame. Then install a piece of flashing, which should extend up and over the nailing fin and be secured to the wall. The flashing should be cut from a 5-inch strip and should overlap the row of siding that is below it by 2 inches. This will help to keep moisture out of the walls, and it will also allow any water that makes its way inside the siding to be directed to the weep holes that are designed for this purpose.

If you are installing a new dormer window, or a window in a wall that projects out from your home, it may be best to use step flashing, which is typically installed as multiple rectangles of sheet metal bent into an L-shape and layered together like fish scales. This will help to create a solid waterproof barrier that is durable and that will not allow for any gaps.

After the flashing is installed, a drip edge should be attached to the bottom of the window, which will help to further protect it from moisture and that will allow water that has made its way through the substrate and weather barrier to drain away from the wall. A type of flashing called Z-flashing is usually used above door and window frames, which has one end of the flashing held tight against the trim, and the other hanging slightly over it.

J-Channel

A J-channel is a piece of trim that has a shape that resembles the letter “J.” It is used to conceal cut edges of your home’s soffit lengths and fascia boards. It also acts as a water channel to prevent moisture from getting into your home.

Using a J-channel is important when installing vinyl siding around your windows and doors. It will keep the siding from cracking or fading and will create a smooth, clean appearance. It is also a good idea to use it when installing soffit panels on open eaves. This will help prevent the soffit from being clogged with debris, which could lead to rotting or leaks.

To install the J-channel, first cut it to the appropriate length with a miter saw or tin snips. Then, put on your gloves and place the J-channel in a vise or clamp. Using your tin snips, cut the J-channel along the line you marked, creating a flap on both ends. Next, fold each of the end pieces down to the bottom of the J-channel. Afterwards, nail the bottom piece of J-channel to the fascia board, making sure that it laps over the side pieces of the channel.

Now you can start to nail in the rest of the J-channel. Make sure that you nail at the slot centers to allow for expansion. If you are installing a soffit on an open eave, nail one band of J-channel every 8 to 12 inches. If you are installing a soffit over an enclosed eave, then you may need to add a second band of J-channel at the corners of your roof.

You should also consider adding a layer of substrate over the J-channel to protect your home from moisture damage. A popular material to use for this is oriented-strand boarding, which is similar to plywood. Once the substrate is in place, you can install a weather barrier on top to further protect your home from moisture. A weather barrier is a great way to increase the longevity of your vinyl siding and will help you avoid costly repairs down the road.

Undersill Trim

Many home improvement contractors overlook the importance of substrate and a weather barrier, especially around windows. Without them, moisture can seep into the wall and cause rot and damage. If you’re considering having your siding replaced, be sure to look for a contractor that uses them. If your siding contractor claims to use them but doesn’t show proof, that should be a red flag.

When working with vinyl siding, there are a few special trim pieces that hold everything together or hide the edges and ends of your panels. These include undersill trim, J-channel, and metal head flashing.

Undersill trim — also known as cellwood vinyl finish trim — secures the trimmed end of siding panels under windows and other horizontal projections. It’s similar to the fascia trim that’s installed at the eaves, and both should be stained or painted to match your home’s exterior.

Building paper is a layer of waterproof protection that prevents water from getting behind the siding and damaging the wood framing beneath. It’s important to install a full sheet of it at the bottom of your wall, with upper pieces lapped over lower ones and taped over any tears or holes. Then, the undersill trim should be secured to the underside of the siding panel and the nailing fin with flashing tape.

Once you’re ready to install your siding, you should start at the bottom and work your way up. This keeps the rain and wind from penetrating your house’s structure and causing damage to the walls and insulation. It also provides the best coverage to your window trim and sills.

Before you begin, make sure to power wash the entire area and remove any caulk that’s holding your siding in place. This will ensure that any paint or stain you’re using doesn’t trap dirt and residue underneath, which can lead to uneven or bubbling. Then, before you begin working with the vinyl, you’ll want to apply a primer and two coats of stain or paint. This will provide a final layer of protection and make it easier to maintain.